Making a gadget sticky or floating means to make it fixed in a position when page is scrolled down and it is possible with javascript. Gadgets are made sticky to provide visitors a good user experience such as a menu which floats with user so now he doesn't need to scroll up again and again to navigate through your blog. Similarly more gadgets are also made sticky such as ads or email subscription widget to get more clicks on ads and to get more subscribers respectively. You can see a live demo of making a gadget sticky on right side of this page(Recommended Articles). I have made it sticky to help visitors reach all of my content. Similarly you can also do it by following this post. So if you want to make any of your widget sticky then follow below steps.
Don't Miss:
- Floating Vertical Menu For Blogger
- How To Make Sidebar Float/Scroll In Blogger
- How To Add Scrolling Text Or Images In Blogger
- Floating Social Sharing Bar For Blogger
- Twitter Flying Bird Gadget For Blogger
How To Make A Gadget Sticky Or Float In Blogger:
Step 1: Go to blogger dashboard and navigate to layout.
Step 2: Add a gadget or edit an existing gadget which you want to make sticky.
Step 3: Copy its ID as shown in below image:
You Might Also Like: How To Find ID Of A Widget In Blogger.
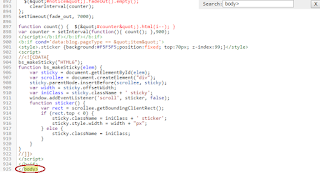
Step 4: Go to template and search for </body> by using Ctrl+F.
Step 5: Copy below code and paste it just above </body>.
<style>.sticker {background:#F5F5F5;position:fixed; top:0px; z-index:99;}</style>
<script>
//<![CDATA[
bs_makeSticky("HTML6");
function bs_makeSticky(elem) {
var sticky = document.getElementById(elem);
var scrollee = document.createElement("div");
sticky.parentNode.insertBefore(scrollee, sticky);
var width = sticky.offsetWidth;
var iniClass = sticky.className + ' sticky';
window.addEventListener('scroll', sticker, false);
function sticker() {
var rect = scrollee.getBoundingClientRect();
if (rect.top < 0) {
sticky.className = iniClass + ' sticker';
sticky.style.width = width + "px";
} else {
sticky.className = iniClass;
}
}
}
//]]>
</script>
Step 6: Replace HTML6 with your gadget's ID which you found in step 3.
Step 7: Click on save template and you are done.
Customization:
(1). To change background color or your floating widget replace #F5F5F5 with desired color code.
You Might Also Like: How To Get Code Of A Color, Color Code Generator.
(2). To Change the height of your floating widget(height from top) make changes in top:0px;
I hope you like this post and it was helpful to you. Follow and subscribe to our newsletter or stay in touch with us via social networks to get latest updates about blogger tricks. Thanks for visiting 101helper.blogspot.com. Share this post with others and help me spread my blog.
Search Tags: Sticky gadget blogger, jquery tricks blogger, make a div float, javascript tricks blogger, 101helper blogging tricks, make a widget floating or sticky in blogger.
Search Tags: Sticky gadget blogger, jquery tricks blogger, make a div float, javascript tricks blogger, 101helper blogging tricks, make a widget floating or sticky in blogger.
Rate This Article
Thanks for reading: How To Make Gadget Sticky/Float In Blogger, Stay tune to get latest Blogging Tips.


